Every great custom t-shirt begins with a spark of inspiration – perhaps a brilliant business idea, a memorable family moment, or a creative vision that demands to be shared with the world. Yet the journey from that initial concept to holding a beautifully printed t-shirt in your hands can seem daunting, especially if you're new to the world of custom apparel design.
At The Tee, we've guided thousands of Australian customers through this exciting creative process, transforming everything from rough sketches to polished digital concepts into professional custom t-shirts using premium AS Colour blanks. Whether you're designing your first custom tee or looking to refine your approach, this comprehensive guide will take you through each step of bringing your t-shirt design to life.
Stage 1: Concept Development and Ideation
The foundation of any successful custom t-shirt lies in a well-developed concept that clearly communicates your intended message, aesthetic, and purpose.
Define Your Purpose: Before putting pen to paper or cursor to screen, clearly articulate why you're creating this design. Are you building brand awareness, commemorating an event, expressing personal creativity, or solving a specific problem? Your purpose will guide every subsequent design decision.
Know Your Audience: Understanding who will wear your t-shirt is crucial for creating designs that resonate. Consider their age, interests, style preferences, and the contexts in which they'll wear the garment. A corporate event tee requires different design sensibilities than a music festival shirt or family reunion apparel.
Research and Inspiration: Gather inspiration from various sources whilst ensuring your concept remains original. Look at successful designs in your category, explore current design trends, and consider how you can add your unique perspective to established themes.
Brainstorming Techniques: Use structured brainstorming methods to develop your concept:
Mind mapping to explore different thematic directions
Word association exercises to discover unexpected connections
Mood boarding to establish visual and emotional directions
Sketching quick thumbnails to explore various layout approaches
Concept Refinement: From your initial brainstorming, select the most promising concepts and develop them further. Consider how each concept would translate to different t-shirt colours, sizes, and printing methods.
Stage 2: Design Planning and Technical Preparation
Once your concept is solid, the planning phase ensures your design will translate effectively from screen to fabric.
Choose Your Canvas: Selecting the right AS Colour blank is crucial for your design's success. Consider factors such as:
Fabric colour and how it will interact with your design colours
Garment style (classic, fitted, oversized) and how it affects design placement
Target demographic and their fit preferences
Intended use (casual wear, corporate uniforms, event merchandise)
Understand Print Areas: Different printing methods have varying maximum print sizes and placement options. Standard print areas include:
Front chest (typically 12" wide maximum)
Full front (up to 14" wide on larger sizes)
Back placement (usually larger print area available)
Sleeve prints (smaller area, consider text readability)
All-over prints (specialised technique with unique requirements)
Colour Considerations: Plan your colour palette with both aesthetic and practical considerations:
How many colours will your design require?
Will certain printing methods be more cost-effective for your colour count?
How will your design colours interact with the garment colour?
Are there any colour reproduction challenges with your chosen printing method?
Technical Specifications: Professional custom printing requires specific technical parameters:
Resolution requirements (typically 300 DPI for print-ready files)
File format preferences (vector files for simple graphics, high-resolution rasters for complex images)
Colour space considerations (RGB for screen viewing, CMYK or Pantone for printing)
Bleed and safety margins for professional printing
Stage 3: Design Creation and Digital Development
With your concept and technical parameters established, it's time to create your actual design files.
Choose Your Tools: Select design software appropriate for your skill level and design complexity:
Professional Vector Software: Adobe Illustrator or similar programs excel for logos, text-heavy designs, and graphics requiring scalability without quality loss.
Raster Graphics Software: Adobe Photoshop or alternatives work well for photographic elements, complex illustrations, or designs requiring detailed image manipulation.
User-Friendly Alternatives: Canva, GIMP, or online design tools offer accessible options for simpler designs or those new to digital design.
Design Development Process:
Start with rough digital sketches to establish composition and layout
Develop individual design elements (typography, graphics, imagery)
Experiment with different arrangements and hierarchies
Refine details, spacing, and proportional relationships
Test colour combinations and contrast levels
Typography Considerations: If your design includes text, careful typography selection enhances both readability and aesthetic appeal:
Choose fonts that align with your message and audience
Ensure readability at the size your text will be printed
Consider font licensing for commercial use
Test text legibility on different background colours
Visual Hierarchy: Establish clear visual hierarchy to guide the viewer's eye through your design:
Primary elements should be most prominent (largest, highest contrast)
Secondary information should support without competing
Use spacing, size, and colour to create logical flow
Consider how the design will read from typical viewing distances
Stage 4: Design Testing and Refinement
Before committing to final production, thorough testing ensures your design achieves its intended impact.
Print Testing: Create test prints to evaluate how your design translates from screen to paper:
Print at actual size to assess scale and readability
Test on different paper colours to simulate garment colours
Evaluate colour accuracy and vibrancy
Check for any elements that may be too small or detailed for printing
Mockup Creation: Use digital mockups or physical samples to visualise your design on actual garments:
How does the design look on different garment colours?
Does the design placement feel natural and proportional?
How will the design appear on different body sizes and shapes?
Does the overall aesthetic align with your original concept?
Feedback Collection: Gather opinions from trusted sources within your target audience:
Is the message clear and immediately understandable?
Does the design evoke the intended emotional response?
Are there any elements that seem unclear or problematic?
How does the design compare to alternatives in the market?
Iterative Refinement: Based on testing and feedback, refine your design:
Adjust sizing, spacing, or positioning as needed
Refine colour choices for optimal impact and printability
Simplify overly complex elements that don't reproduce well
Enhance elements that test particularly well with your audience
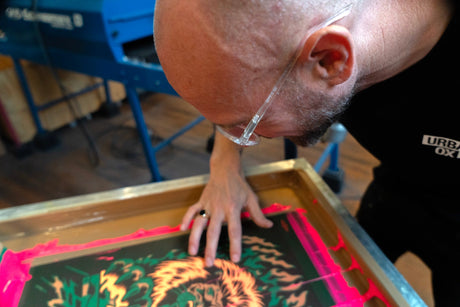
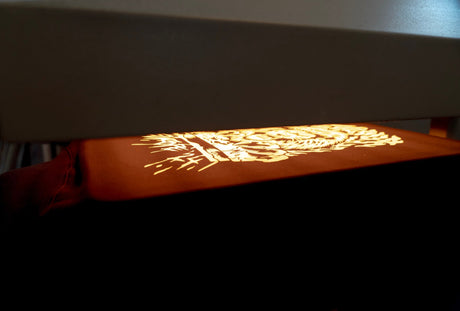
Stage 5: File Preparation and Print Production
Preparing your design files correctly is crucial for achieving professional printing results.
File Format Optimisation: Different printing methods require specific file formats:
Screen Printing: Vector files (AI, EPS) or high-resolution raster files with separated colours work best for clean reproduction and colour accuracy.
Direct-to-Garment (DTG): High-resolution PNG or TIFF files with transparent backgrounds typically yield optimal results for this digital printing method.
Heat Transfer: Vector files ensure crisp edges and clean cutting for vinyl applications, whilst detailed designs may require high-resolution raster formats.
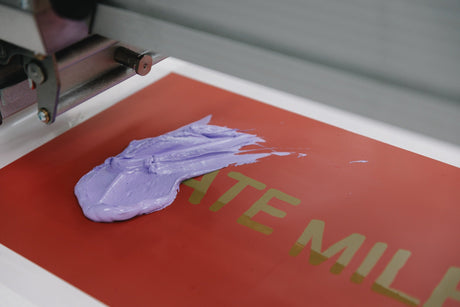
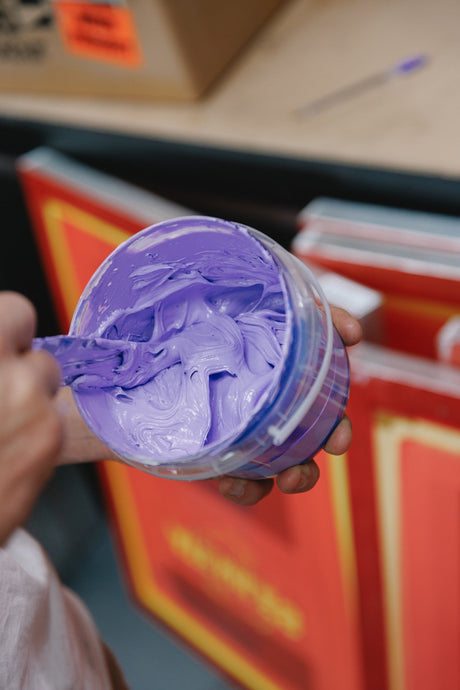
Colour Separation: For screen printing, proper colour separation is essential:
Each colour requires a separate layer or file
Overlapping colours need careful planning to avoid registration issues
Gradients and complex colour blends may require special handling
Transparency effects need to be properly flattened for production
Quality Control Checklist: Before submitting files for production:
Verify all fonts are outlined or embedded
Check resolution meets minimum requirements (300 DPI)
Confirm colours are specified correctly (Pantone, CMYK, or RGB as required)
Review file organisation and naming conventions
Include any special printing instructions or placement notes
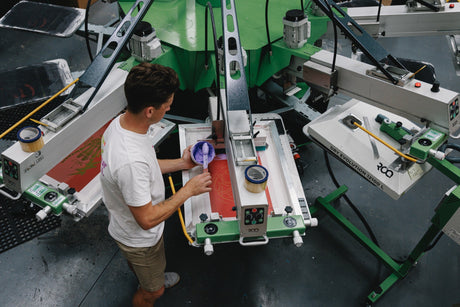
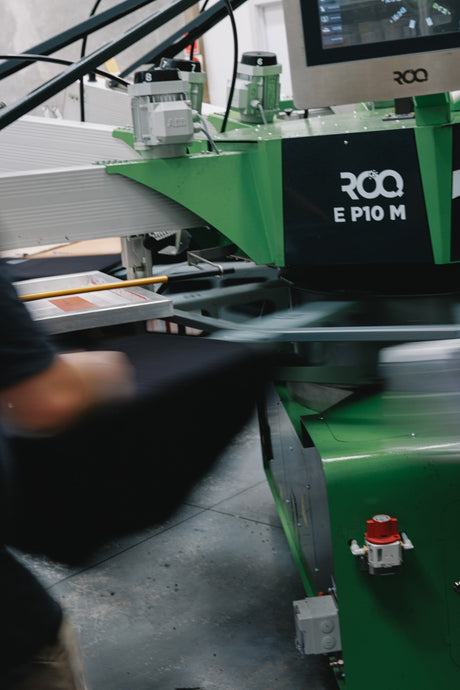
Stage 6: Working with Professional Printers
Partnering with experienced custom apparel providers like The Tee ensures your design vision translates into exceptional finished products.
Printer Selection: Choose a printing service based on:
Experience with your specific design requirements and printing methods
Quality of materials (like AS Colour premium blanks)
Portfolio of similar projects and customer testimonials
Technical expertise and design support capabilities
Production timeline and customer service quality
Pre-Production Consultation: Professional printers provide valuable input during the pre-production phase:
Printing method recommendations based on your design and budget
Colour matching and reproduction advice
Design optimisation suggestions for better printing results
Timeline planning and production scheduling
Proofing Process: Reputable printers offer proofing options to ensure satisfaction:
Digital proofs for colour and placement verification
Physical samples for critical projects or large orders
Revision opportunities before full production begins
Final approval processes that protect both parties
Production Monitoring: Stay engaged during the production process:
Understand the production timeline and key milestones
Be available for any questions or clarifications
Review quality control measures and inspection processes
Plan for delivery logistics and timeline coordination
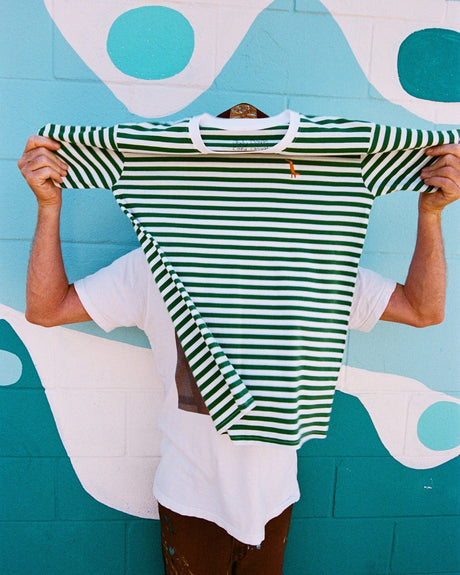
Stage 7: Quality Assessment and Final Delivery
The final stage involves evaluating the finished products and ensuring they meet your expectations and quality standards.
Quality Inspection: Thoroughly examine the finished custom t-shirts:
Print quality – sharpness, colour accuracy, and consistency
Garment quality – fabric, stitching, and overall construction
Design placement – accuracy and alignment
Overall aesthetic – does it match your vision and expectations?
Performance Testing: Consider testing durability through washing and wearing:
How does the print hold up to normal washing cycles?
Does the garment maintain its shape and comfort?
Are there any issues with colour fastness or print adhesion?
How does the design look after extended wear and washing?
Documentation and Learning: Record the process for future reference:
Document successful techniques and specifications
Note any challenges or lessons learned
Collect feedback from end users about design effectiveness
Build a reference library for future design projects
Beyond the First Print: Building on Success
Successfully bringing your first t-shirt design to life opens doors to expanded creative and business opportunities.
Design Evolution: Use insights from your first project to inform future designs:
What elements resonated most strongly with your audience?
Which technical approaches yielded the best results?
How can you build on successful themes whilst maintaining freshness?
What new challenges or opportunities does your success create?
Expanding Your Range: Consider developing complementary designs or variations:
Seasonal variations of successful designs
Different garment styles featuring your core design themes
Coordinated designs for different demographics or use cases
Limited edition or special collection concepts
Building Relationships: Maintain connections with printing partners and suppliers:
Develop preferred vendor relationships for consistent quality
Stay informed about new printing technologies and capabilities
Negotiate better terms for repeat business and larger orders
Build collaborative relationships that enhance creative possibilities
Bringing Your Vision to Life with The Tee
The journey from concept to print represents one of the most rewarding creative processes – seeing your idea transformed into something tangible that people can wear, share, and treasure. At The Tee, we're committed to making this journey as smooth and successful as possible.
Using premium AS Colour blanks and professional printing techniques, we help transform your creative vision into custom t-shirts that exceed expectations. Our experienced team provides guidance throughout the process, from initial concept development through final quality control, ensuring every detail serves your vision.
Ready to bring your t-shirt design to life? Contact The Tee today to begin your journey from concept to cotton. Let's work together to transform your creative ideas into professional custom apparel that makes a lasting impression.